
This one is definitely a weirdo! First you need to understand how the underlying mathematical thread pattern works. See mathematical pattern.
So, there are two lines meeting at right angles, and lines drawn from one line to the other in that specific pattern.
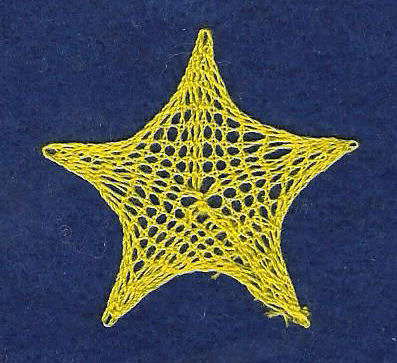
The star is made of 5 of these shapes, fitted together. Work each shape before moving onto the next. Every line is a pair of threads, and where one line crosses another, you work cloth stitch and twist, or a Torchon ground stitch, if you can see the pin hole! (See below.)

Pattern:

Bobbins: 10 pairs
Style: Torchon
Stitches:
half stitch
cloth stitch and twist
twist pair
Details:
Torchon ground (blue or red)
mathematical pattern
how to finish
Description:
The pattern marks some pin holes, but I doubt if you could manage to use them all (and if you tried, to get the correct hole!) However, the pins are not absolutely essential. The only pins which are essential are the start and end of each shape, marked in in red. However, all those cloth stitch and twists without pins are not easy to tighten, so I suggest that you do more pins! The lines are marked, so if you can see a pin hole clear, then do a Torchon ground stitch instead a cloth stitch and twist. This requires a certain amount of thought and care, so I suggest that this is not a beginner pattern!
You can see that some of the lines are green. These show where a pair of threads gets worked all the way to the point (as end of the previous shape) and back again (as start of new shape).
This pattern is not as floppy as pattern 454. The weak spots are all at the centre, so when finishing off, mark sure that the pair of threads at the centre are threaded through each section at the centre before knotting tight. The other pairs are finished as off as usual for a mat - see here.

Close up of the lace, so you can see the working in more detail:
Here is a pattern for a six pointed star:

© Jo Edkins 2020 - return to lace index