

Pattern:
Bobbins: 18 pairs (6 green pairs, 12 pale blue pairs, 1 dark blue pair replaces one of the pale blue pairs from time to time)
Style: Torchon
Stitches:
half stitch
cloth stitch
cloth stitch and twist
twist pair
make a sewing (crochet hook)
reef knot
Details:
Torchon ground (grey)
rose ground (green)
rose ground edge (green)
cloth heart (red)
circular mat
how to finish
Description:
Follow the links above for explanation of how to work the different parts of the lace.
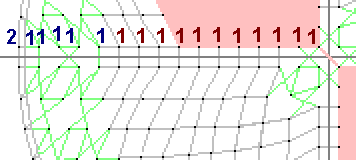
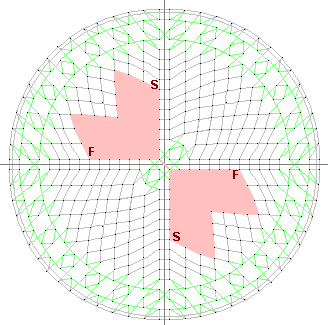
The start is along a diagonal (although it looks horizontal above!), so one pair starts at each pin, and two at the edge. Above, I have marked the position of the false pins.
Click here for how to finish an edge.
This was the first pattern where I tried to do a line of rose ground at the edge. To my surprise, it looks effective, and not very much like normal rose ground. Here I have put a passive in to make a footside, although in my description of rose ground edge I don't bother, as it's not really necessary. So you could leave the passive out here as well, which would reduce the bobbin count by one pair.
The colour needs a little thought. The rose ground edge (and the passive) is all green. This requires cloth stitch and twist where the rose ground meets the Torchon ground.
The butterfly needs even more thought. The wings are the cloth hearts, which are coloured by the worker pair (dark blue). But where does this dark blue pair go in the other two quarters? It is replaced by a pale blue pair. At the end of a wing, a pale blue pair is hung from the final pin. This is twisted round the dark blue worker pair. The dark blue pair is then tied off with a reef knot. This means that the dark blue pair has been replaced by the pale blue pair. When the next quarter has been finished, and you need a dark blue pair to start the other wing, as workers, then replace the appropriate pale blue pair with a dark blue pair in the same way.
There is one more point - the two wings are joined together in the photo (and the pattern) although there is no obvious way to do this. This is done by making a sewing. Work the first wing ignoring the join. But when you work the second wing, at the point of the heart nearest the centre, use a crochet hook to join this wing's point to the other one.
You may find this messing around with colour too complicated. It's quite possible to work the whole pattern in one colour, and ignore the replacing of bobbin pairs or sewings. Still, the different colours do look striking! I'm not too sure about the rose ground near the centre. These were supposed to be the butterfly's body, and I don't think it worked! leave that out, if you prefer.
© Jo Edkins 2016 - return to lace index