
This pattern will only work with the right sized sticks. Please read Introduction to making a fan.
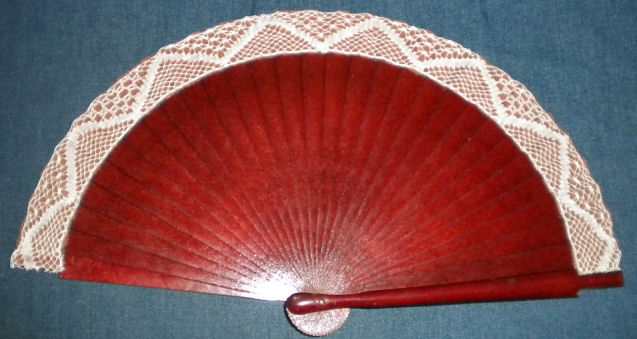
Pattern:
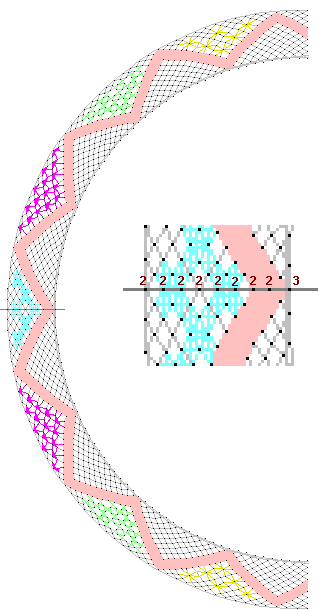
Bobbins: 19 pairs
Style: Torchon
Stitches:
half stitch
cloth stitch
cloth stitch and twist
twist pair
Details:
cloth zigzag (red)
Torchon ground (grey)
star ground (cyan)
triangular ground (pink)
rose ground (green)
spider and line ground (pink)
footside without passives (grey)
twisted footside (grey)
making a fan
Description:
Follow the links above for explanation of how to work the different parts of the lace.
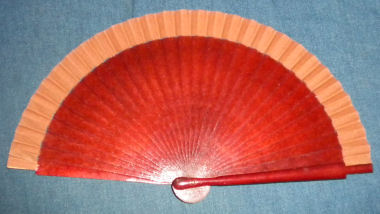
I bought this fan in a charity shop (thrift shop). It is a wide fan, with 180° of arc (a semi-circle). Most of the fan is the highly varnished sticks, and they are held together with a thin strip of boring brown cloth at the edge. So I designed this pattern to cover the cloth.
The pattern is a simple strip which is bent into a circle, like pattern 246. However, as it is such a thin strip, there isn't such a problem of distortion of the grid.
Since it's a large pattern, I started in the middle and worked outwards to the end. The pattern shows where the bobbins should start. When the first half was finished, I cut off the bobbins, tied it off, and removed it from the pillow. I pinned up the pattern again so the other half was on the pillow correctly, and laid the lace over so the edges matched, and did some repinning. Then the new threads get threaded through the old starting holes, and wound onto new bobbins. A bit tricky, but it works.
The pattern is simple, as it's a narrow piece, but there are different grounds to provide visual interest across the fan. It also stopped me getting bored while working it! The inner edge is a twisted footside and the outer edge is a footside without passives.
I left the fabric on the fan, and sewed the lace onto it (rather than sticking the lace onto the sticks with glue, as with the other fans). I sewed the ends, the middle, and half way between the edge and the middle, from inner to out edge. This let me position the lace in the correct place. Then I sewed the outer edge, and the inner edge. I found that the middle of the lace bulged in a couple of places, so the final sewing was a line between the inner and the outer edge, to keep all firm. The sticks got in the way, of course, and had to be avoided. The bit right at one end had to be glued as it overlapped the end stick.
Like all these lace fans, it's easy to snap the fan open quickly. Folding up the fan is a little harder, and needs an eye kept on it to make sure that it's folding properly.
Moral: keep your eye out for interesting but cheap fans that you can adapt!
Fan stick length from hinge to end - 7.5 inches. Width of lace (max) - 4.5 inches. Angle of arc - 120°. I must emphasise - you cannot buy a fan kit or existing fan, and expect this pattern to necessarily match. Fan patterns are very specific to the dimensions of the fan sticks.
© Jo Edkins 2017 - return to lace index