
Click here for more jar cover patterns, plus more information about them.

Pattern:
Bobbins: 16 pairs
Style: Torchon
Stitches:
half stitch
cloth stitch
cloth stitch and twist
insert a bead
twist pair
Details:
double Torchon ground (grey)
cloth diamond (red)
cloth diamond (red)
footside without passives (grey)
rose ground (green)
circular mat
how to finish
Description:
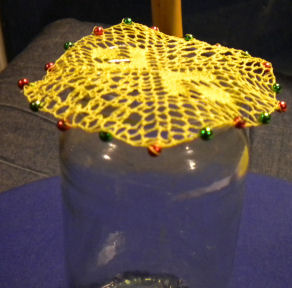
Follow the links above for explanation of how to work the different parts of the lace. I suggest that you do extra twists at the edge of the lace, and after the double Torchon ground, to make it stronger. If you are making it big enough for a jam jar
The start is along a diagonal, so one pair starts at each pin, and two at the edge. Above, I have marked the position of the false pins.
Click here for how to finish an edge.
This type of shape seems to have no straight part, but in fact you work it exactly the same as a square mat. Work a quarter, down to the next dark grey line, then turn the pillow to work the next quarter. Click here to see how to work it. You will need to use a pillow that you can get at from all sides.
The beads are inserted while you are working the lace. They are supposed to hold down the edge of the lace around the top of the jam jar. I found that the beads I used were too light! But you can push the edge down yourself.

© Jo Edkins 2016 - return to lace index